Hand Brazing a Bicycle Frame
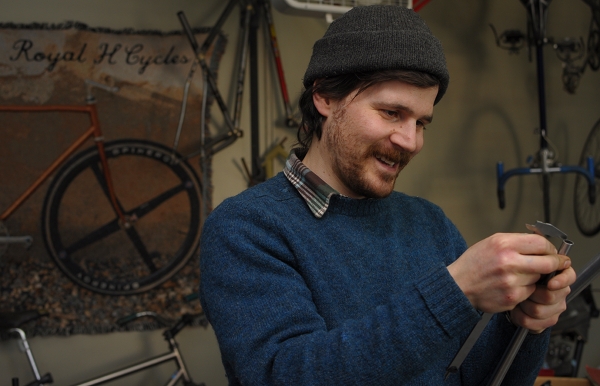
I was visiting Bryan at Royal H Cycles yesterday and was able to get some shots of the brazing process in action. Please don't interpret this as step-by-step instructions, but here is my attempt to explain how it's done:
The frame being built here is a lugged stainless steel beauty ordered by JP. The "main triangle" (seat tube, head tube, top tube and downtube) had already been finished before my visit, and Bryan was working on attaching the seat stays - the thin parallel tubes that connect the seat tube to the dropouts.
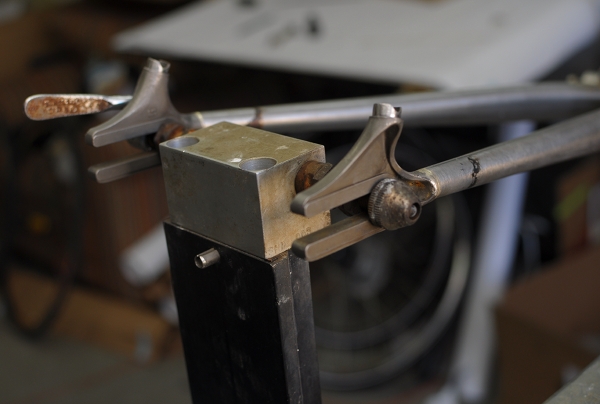
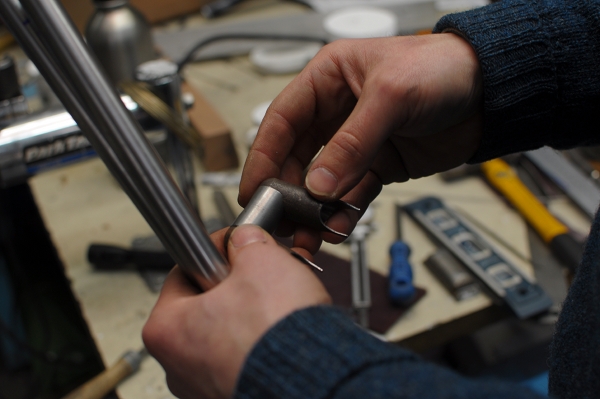
Here are the dropouts without the seat stays.
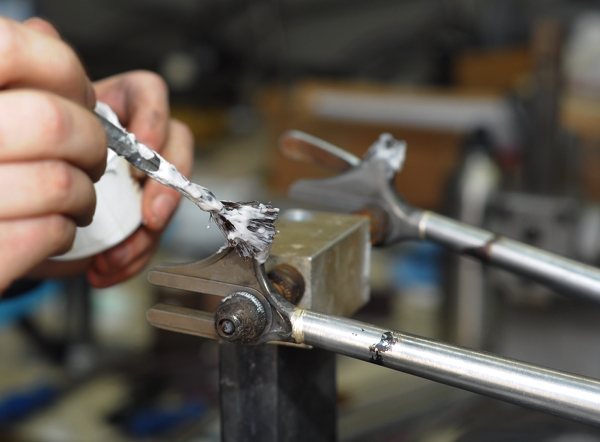
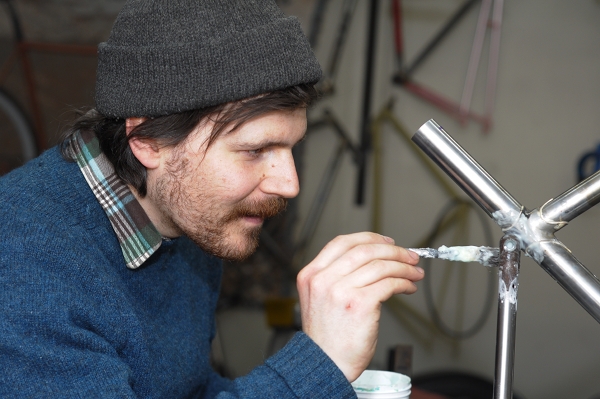
And here is Bryan applying flux to the dropout sockets, where they will connect to the stays. "Flux" is a protective chemical mixture that is part of the brazing process, and it is applied to the joints beforehand.
The dropouts are ready for the seat stays.
The seat stays are prepared.
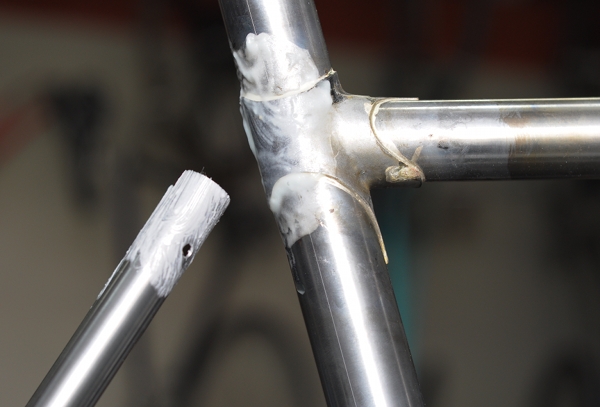
And attached, with more flux added.
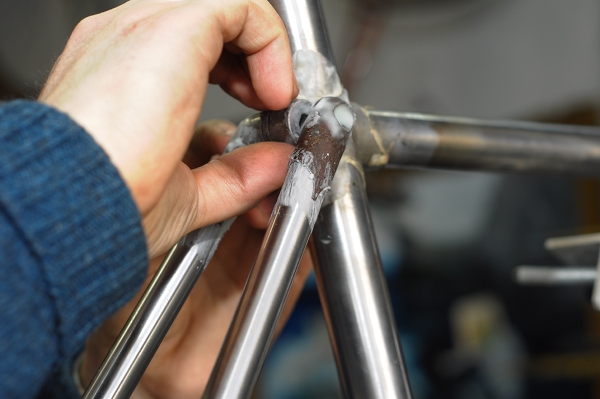
The same is done with the seat cluster.
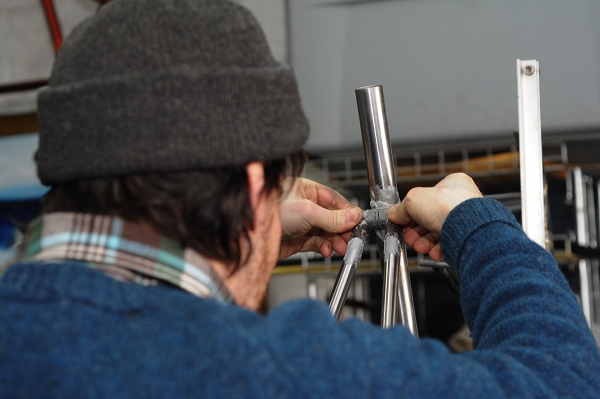
Here is Bryan carefully arranging everything so that it stays in place.
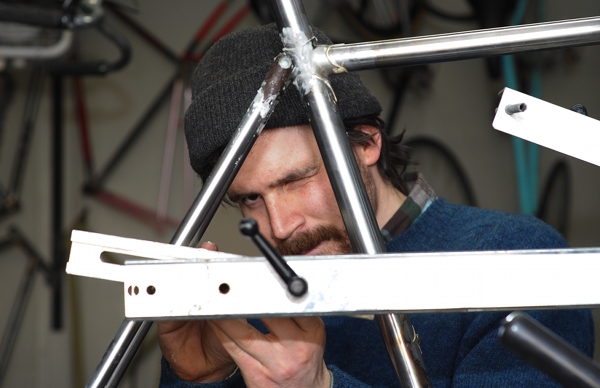
It is crucial that everything is aligned perfectly.
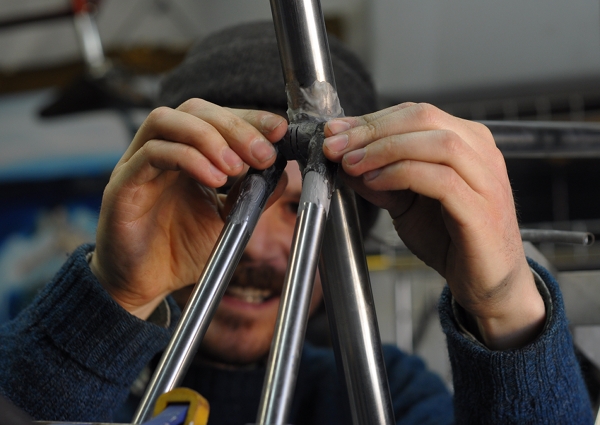
Really perfectly.
More perfectly still.
And there we go.
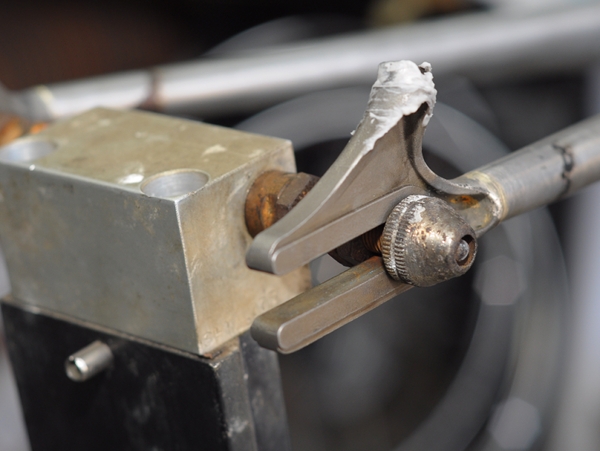
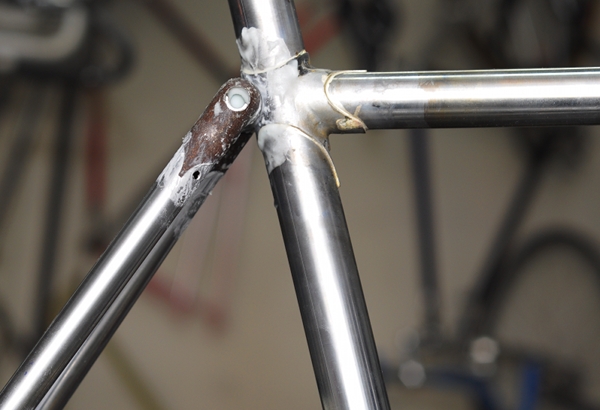
With more flux added for good measure.
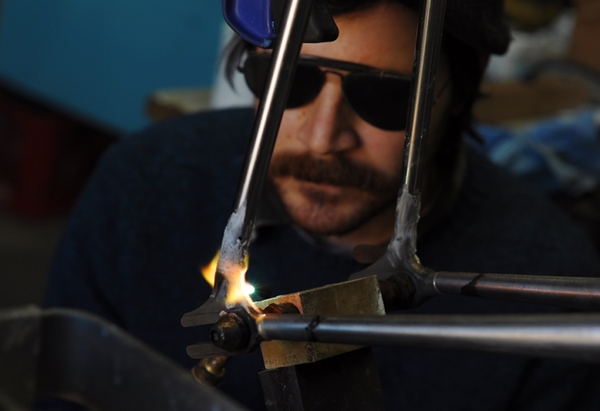
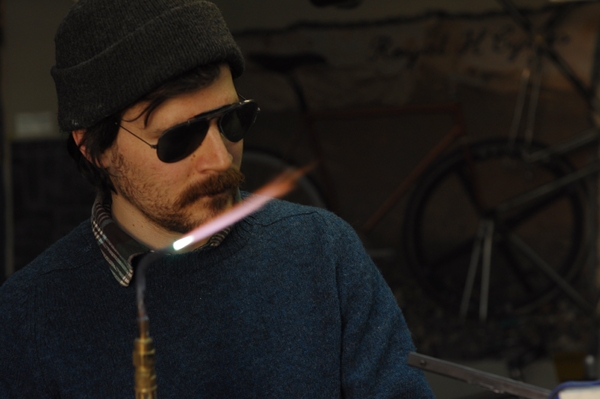
But now, the good part. Fire!
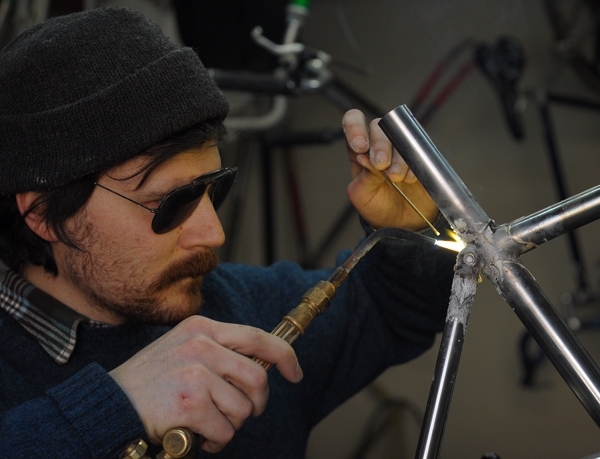
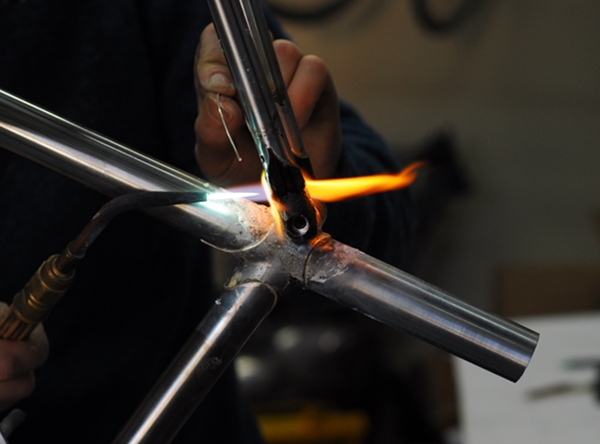
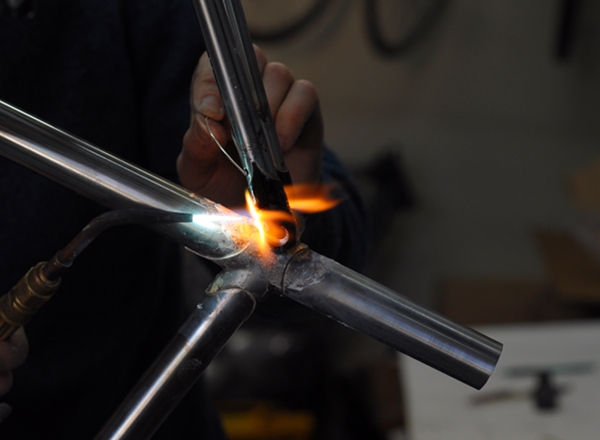
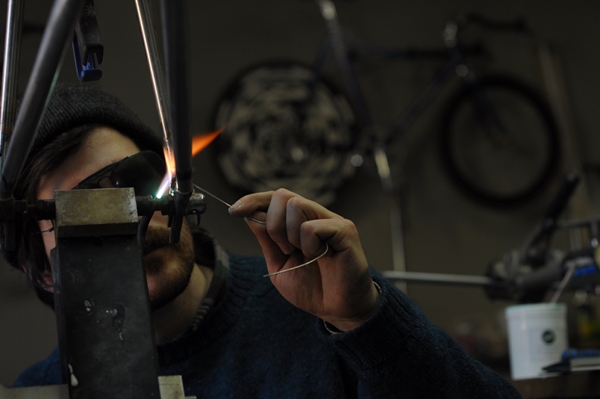
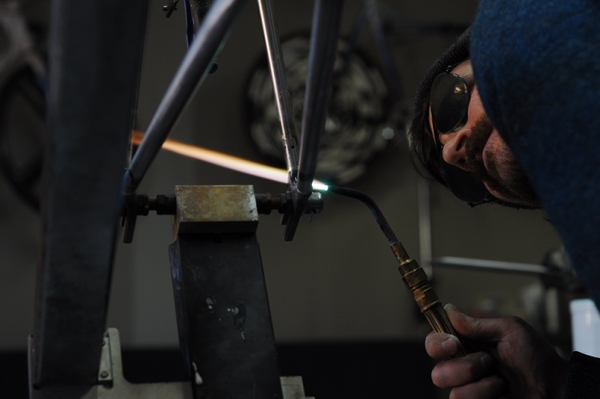
The joint is heated with a hand-held torch, then brazed together using silver or brass (silver is shown here).
Close-up of the process.
That little wire you see is the silver; it is melted into the joint by the torch.
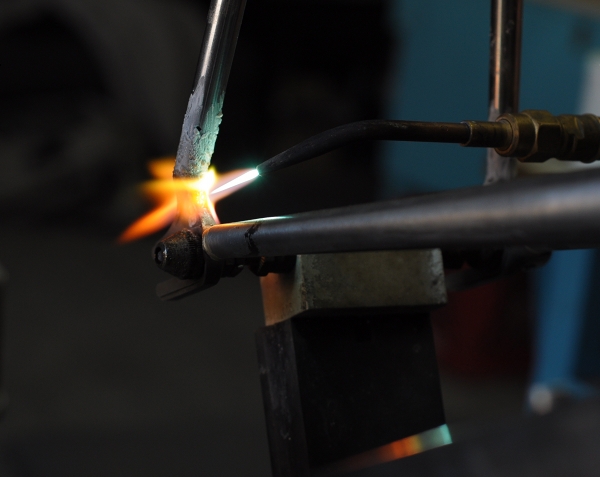
Same procedure for the dropouts.
The process is quite beautiful - though best observed through a camera lens that allows you to stand back while enjoying a close-up view.
I lose track of time when absorbed in something like this, but the brazing did not take long. The key is precision - having steady hands and a good eye, so as to align all the parts perfectly, heat the joint evenly and distribute the silver properly.
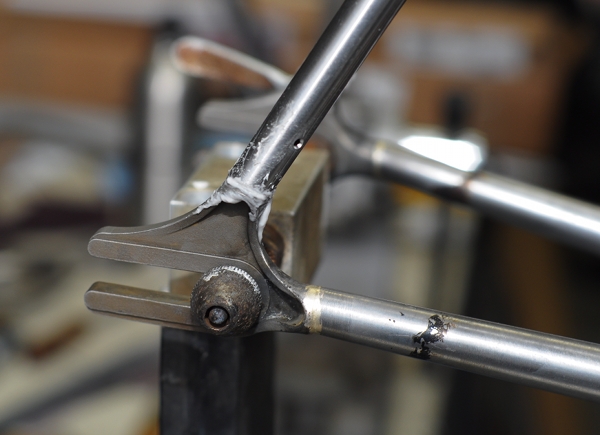
The dropouts post brazing. There is still a lot to do here, such as cleaning and finishing work, but this is the joint. This bicycle will have an internally geared hub, so these are technically "fork ends" rather than dropouts - but nice either way.
I hope this gives you some idea of how lugged steel frames are built, and a Thank You to Bryan for allowing me to photograph him working. If you want to learn more about the hand brazing process, a good place to start is here, as well as this nice video from MAP Cycles. There is also a Framebuilders subforum on bikeforums that is quite helpful. While I have no plans to build frames myself, I enjoy learning how it is done and seeing the process up close.



Flux doesn't really control temperature. It allows the liquid brazing metal to flow or wet the joint, so that it fills the space between the lug and the tube cleanly. It's kind of like a high temperature detergent. It's also a mild acid, so you've got to be really careful to clean it off the metal.
ReplyDeleteNote also the tiny holes in the stays to let the hot gases escape from the weld area. Without them, the brazed joint wouldn't form safely.
awesome photos! I'm going up to Portland OR. to UBI to build myself a porteur this summer, so I will get to experience this first hand! I have done brazing and welding before, and it really can be mesmerizing once you get the hang of it. When you are still learning, it is incredibly frustrating though...
ReplyDeletecheers from California!
Great pics. Well told story.
ReplyDeleteFlux doesn't so much control temperature as it controls chemical reactions. When temperatures go up, chemical reactions - like rusting - speed up. When you apply heat to metal, rusting or oxidation happens almost instantly. We apply flux to the joint to interfere with those chemical reactions. It also helps remove impurities from the metals in the joints. Think of it as a chemical maid running around the joint picking up after everyone ensuring the joint is clean and tidy.
Thanks for the story.
I knew I'd be corrected about the flux : ))
ReplyDeleteOkay, I rephrased it as "protective chemical mixture". Better?
I do not want to parrot a description that I don't understand, nor to launch into a technical explanation that will be over readers' heads. But if you want to explain the process in more detail in the comments, that would be great.
I've been documenting the build of my bespoke lugged-frame tourer by a very fine builder over here in England - Mark Reilly at Enigma - and the more I see of the process, the more impressed I am. It is a beautiful art - and yes, as a professional writer, I have to say that the flux bit is tricky to fit into a couple of neat wholly accurate and easily readable sentences!
ReplyDeleteThe other (secondary) use for flux
ReplyDeletethe I find useful (besides
allowing the filler metal to wet the steel
and gobble up impurities) is that it gives an
indicator of the temperature of the joint.
Not the only indicator mind, but one of them.
It also tells you if you are overcooking
the joint, when it starts to turn black.
John I
Yeah. Here is more info on flux from Amazon.
ReplyDeleteA truly amazing and beautiful process. I have great admiration for Bryan. This photo essay gives some idea of the technical skill needed to build a bike frame. An artisan at work! Wonderful to get to see this as it happened. Thank you very much!
ReplyDeleteBryan does good work. He is also amazingly calm and collected while brazing, even whilst being photographed : )
ReplyDeleteGood explanation of the skill and artistry that goes into custom bicycles. This one reason custom bikes cost so much more than welded bikes.
ReplyDeleteEven production bicycles that are brazed require the most skilled workers to get a decent bike to be the top of the line non-custom bikes.
The more a person comes to understand the manufacturing process that goes into making bicycles the more they can appreciate the cost of a good bike.
Flux seals metal from the air so that it doesn't oxidize, while at the same time allowing brazing compound (or solder) to penetrate the gap and do its capillary action thing. Heat promotes oxidation, flux inhibits it. Richard Finch's books are great introductions to welding, brazing and joining metal. WELL worth it if you are considering learning to join metal for anything: go carts, planes, bicycles, motorcycles, race cars...
ReplyDeleteWalt D said...
ReplyDelete"...The more a person comes to understand the manufacturing process that goes into making bicycles the more they can appreciate the cost of a good bike."
Very true. I saw my mixte frame in various stages of completion, and there were more steps to building the frame than I had hitherto realised. The finishing is especially time consuming, especially if a framebuilder is detail-oriented and likes to have everything super smooth. But the hardest part for me would be to get everything aligned evenly before brazing; that just seems insanely difficult to me.
Phil - I am thinking of getting one of those books, so as to understand the process in depth from a design and engineering perspective. It took me over a year of conversations with framebuilders just to get to the point where I can actually read such a book and "get it", but I think that I am finally there.
Great pictures!
ReplyDeleteShows a craftsman at his craft, somewhat of a hidden art in America now-days.
Thanks for your craft, photography, also.
One of the other purposes of flux is to stain your shoes and discourage nail-biting. I mess around with brazing a lot, I make racks and repair things and do a bunch of basic metal work but I am such an amatuer compared to these guys. It's such a satisfying skill to have, even more than welding.
ReplyDeleteSpindizzy
Hmm. Could someone be looking into a custom made bike with low trail geometry and 650B wheels?
ReplyDeleteAnon 9:05 - Not me personally, but stay tuned : )
ReplyDeleteI really enjoyed seeing and reading how this is done. Thanks.
ReplyDeleteYes, I was thinking your mixte would be a good rando candidate.
ReplyDeleteJim
Jim - Nope, my mixte has very different geometry than a traditional "randonneur" would. Mid trail, 700C wheels, short chainstays. I like it just the way it is and wouldn't want to turn it into something else. But it looks like I'll have an opportunity to work with Bryan on someone else's bike which we'll make a true randonneur. More info on that as it unfolds.
ReplyDeleteI like the integrated seatstay-seatpost clamp, with the tiny lugs. Very cool and quite different from the designs I'm most familiar with. Is that a Royal H. specialty?
ReplyDeleteGiven the horizontal fork ends, is the bike destined to be a single-speed/fixie?
MT cyclist - This will be an 8 speed IGH with Porteur-ish handlebars. I agree that the seat cluster is very nice! I don't usually like fastback stays, but this is different. From what I've seen, Bryan likes to get inventive with seat stay caps and dropout sockets, so I guess that can be considered a signature touch. He didn't make these though; I believe they are from a small English manufacturer.
ReplyDeleteStill, wheel size and mid trail to small trail and a few mm of chainstay length are negligible, if you were to carry a small, say 15 lb. weight on the front.
ReplyDeleteHeine, and many British rando's, have run their qualifiers and PBP on pure racing bikes.
All I'm saying is try it, as you have all the materials at hand.
Jim
Jim - I guess I am confused re what you mean by trying it. Do you mean use the bike as is to ride long distance, or do you mean try converting it to 650B?.. The former I am confident that I can do on this bicycle. The longest I've gone on it so far was 45 (hilly) miles and it felt great, especially given the upright position. But what I mean is that I wouldn't want to do anything to alter its existing design. It's its own thing and I like it that way. Still, I'm curious how a low trail 650B bike would handle in comparison.
ReplyDeleteIn general, I have found that I am comfortable and uncomfortable on a wide variety of bikes and I have not succeed in finding common threads to them yet. My Rivendell, Royal H mixte and vintage Bianchi are 3 very different bikes and yet all 3 feel extremely comfortable in comparison to other road-ish bikes I've owned or own. What is the common thread? No idea, but I am fascinated.
Velouria said...
ReplyDelete" But the hardest part for me would be to get everything aligned evenly before brazing; that just seems insanely difficult to me."
Let me share with you that a frame can warp in the brazing process in ways that are so unpredictable it's madding! Even a skilled craftsmen have this happen but most of the uber-skilled craftsmen can "read" the metal and know what to do to stop a warp or to correct a warp. Sometimes it takes brute force and torch to get the warp out of a frame.
All in all the craftsmen who do this work deserve hero status when they can coax a straight frame every time. I personally hold a master welder/brazer in the highest regard for their work. I can engineer it but only a master welder/brazer can make it.
I'm referring to your earlier post about JH vs. GP, and how they both offer valid theoretical points but both philosophies are correct depending on where the weight is carried for a long distance event.
ReplyDeleteMy point is if you are comfortable on your bike you can ride it much farther than you have gone. At some point it isn't comfortable so one must make a body or machine assessment: which one to change.
From what I've read your mixte rides superbly and all your contact points are dialed. Finding a bike's limitations vs. your own is a personal equation, but I think a simple switch of handlebar on your fast, comfortable bike will reveal how good it can be.
Jim
If this doesn't help the current generation understand why some of us still love our lugged steel frames, I don't know what will.
ReplyDeleteJim - Oh I agree entirely. I don't need another roadbike right now, except eventually I'd like a replacement for my fixed gear bike. But as far as touring bikes go, I am all set - The only reason I'd like to try a classic "JH style" randonneur is out of curiosity.
ReplyDeleteNice post Velouria especially as I've only just returned from 7 days in Canterbury, UK where I have successfully built a lugged-steel frame and fork to my own specifications (it'll be a single-speed with a geometry that sits somewhere between a path-racer such as the Guvnor and a track bike).
ReplyDeleteI learnt a great deal in those 7 days but in undertaking this course I can also now truly begin to appreciate the tremendous skill of an artisan like Bryan here. I've just barely scratched the surface in comparison. There's so much more to learn not least pertaining to geometry; so much tacit knowledge which can only come with years of building frames for diverse purposes.
Judging from the photos it's clear to me that my own brazing efforts are not a patch on Bryan's work. I have a fair amount of cleaning up off glassy flux and brass braze to get through before beginning the build however I did see an marked improvement with my later brazes and I want improve further.
I have definitely caught the bug. After years of designing things on a computer which don't exist and never will I can't begin to describe how good it feels to rediscover that seemless relationship between head, hand, senses and the materials you're working with - to being to tacitly understand what you're doing rather than abrogating much of the thinking and comprehension to a machine. In the process I also began to rediscover my ability to concentrate for more than 30 seconds, to not think in hyperlinks and to piece together my swiss-cheese consciousness.
I plan to found my own workshop. I desperately want to improve and I want to share the knowledge with others. I want to create objects that are expressly functional yet elegant in form and purpose, human-scale and that will last more than a lifetime.
Thanks for posting these wonderful images. Looking at these I crave to get back into the workshop and begin another frame.
Grant - good luck with the learning process and the workshop plans; your experience sounds wonderful. I too enjoy creating tangible objects more than working on the computer, and in my case more than doing scientific research.
ReplyDeleteVelouria - thank you for your kind words. For anyone interested in framebuilding in Europe (I'm an Australian living in Norway) or the UK specifically, or if someone is willing to travel from North America I can heartily recommend the frame and fork course at Downland Cycles in Canterbury. The chaps running it are patient, will explain and demonstrate everything thoroughly and will also step in to make sure you don't end up blowing a hole in the tubing if needs be!
ReplyDeleteAs a English town with a medieval centre and with everything readily within walking or cycling distance Canterbury proved to be a fitting environment to learn a little of this craft. And to top it off there's a Farmer's Market supplying local and regional produce occupying a former Railway Goods Shed - a fantastic piece of Victorian utilitarian architecture - barely 10 minutes walk from the workshop. A perfect place to spend your lunchtimes sampling local organic fare while taking a pause from all the filing of mitres and getting the lugs to temperature.
I plan to return to Canterbury soon to undertake their wheel-building course. I can't wait!